Don't be evil
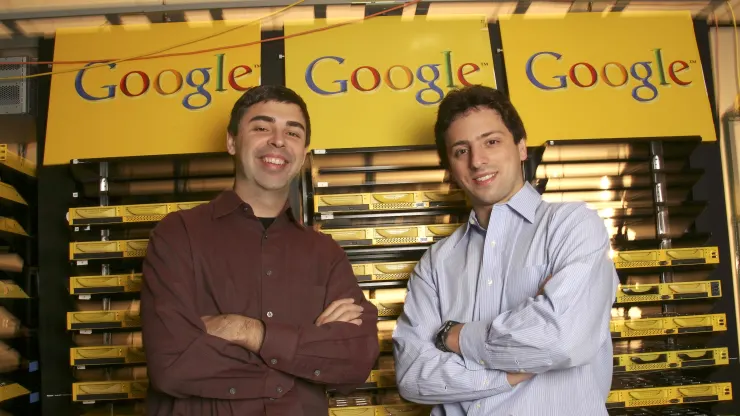
Everyone knows that Larry Page and Sergey Brin officially incorporated their company, Google, on September 4, 1998, in a garage rented for $1,700 a month by their friend Susan Wojcicki.
And it is widely known that they relied on inexpensive materials (extremely cheap materials) to build their first production servers
Figure 2 & 3 : Google first production servers
This part of the story was written 20 years ago and has changed the world forever. However, some of the most important questions still remain unanswered: Can Lego keep up with production ? And what will the next two gifted (and broke) engineers use to change the world ?
Let's take on the challenge and attempt to build a highly scalable, resilient system capable of hosting a revolutionary new software on old hardware
Back to school
Let's say I am a student in my final year, planning to utilize my master's project to create a prototype and secure funding. I have a one-year development phase ahead of me and I am looking for a cost-effective solution that is also powerful enough.
Considering my requirements, the Google free plan is either too limited in terms of duration or lacks the necessary resources. Therefore, I have decided to go with plan B and start the development process "on prem" in my own room.
To begin with, I have two old gaming PCs and my sister's old laptop at my disposal. I have also made the decision to hold off on investing the 2500 CHF I saved for my world tour. Instead, I will consider using it to either migrate to Google Kubernetes Engine (GKE) or purchase a brand new HPE ProLiant MicroServer Gen10 Plus v2 in the future, if I am able to generate some revenue.
From a hardware capacity perspective, my requirements are as follows:
- I need a single access point to the storage, which is located on different hardware.
- I want the ability to quickly increase computing power and memory.
- In simple terms, I want to be able to add an additional inexpensive PC and utilize all its resources (disks, CPU, and memory) in less than 15 minutes.
From a software capacity perspective, the requirements are as follows:
- I need to increase the number of working nodes to effectively distribute the workload.
- I need access to a shared event bus to manage the state of our distributed application.
- It is presumed that I will also need access to a shared database to store some data, although the event bus might be sufficient for most use cases (more details on this later).
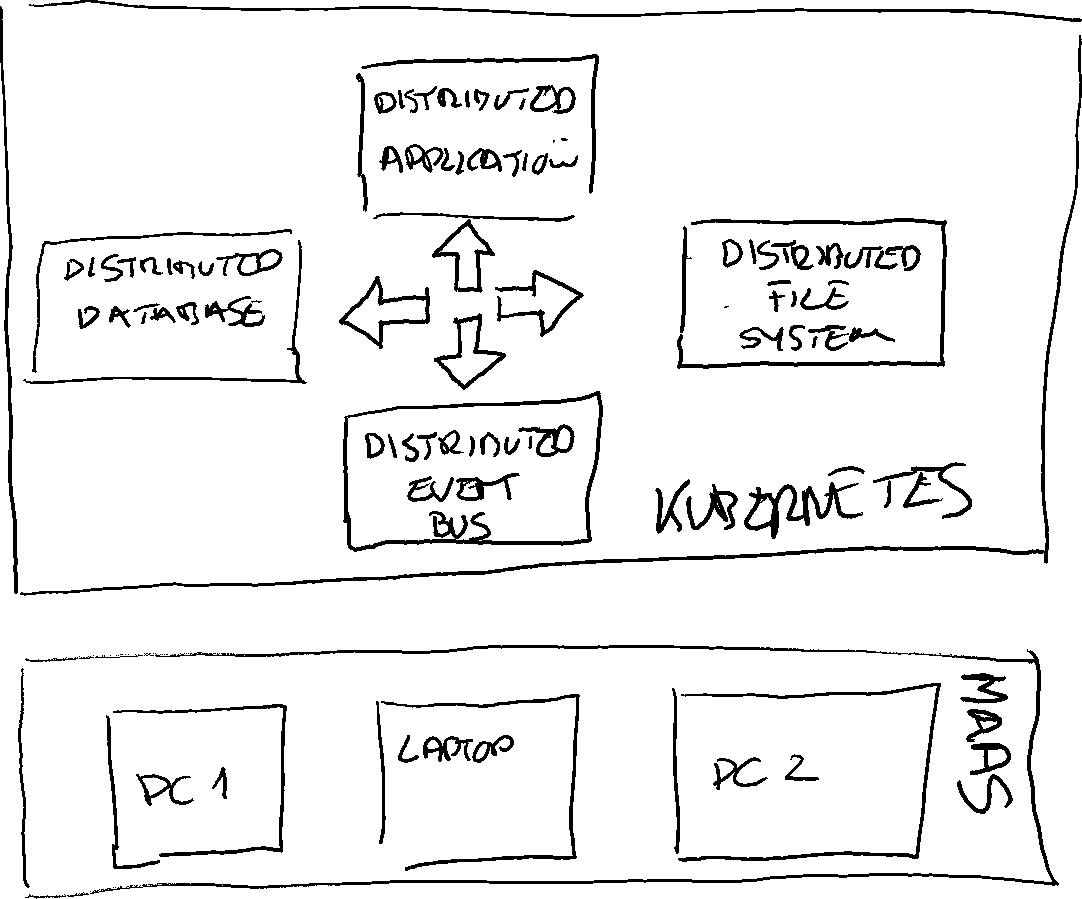
Figure 4 : High level overview of the system
Kubernetes and Microk8s
Kubernetes is the most commonly used tool for managing containerized workloads and services. It handles scaling, provides deployment patterns, and manages external access to resources. I won't go into further detail on this topic as I'm sure everyone is familiar with Kubernetes nowadays. To simplify my cluster setup, I will use MicroK8s. You can compare it with other Kubernetes solutions here
Distributed file system : Ceph & Rook
Ceph is a distributed network file system that is designed to offer high performance, reliability, and scalability. It abstracts disks and partitions and provides a unified file system across multiple storage nodes. It handles tasks such as replication, rebalancing, and recovery.
Rook utilizes Kubernetes to automate various storage administration tasks, including deployment, bootstrapping, configuration, provisioning, scaling, upgrading, migration, disaster recovery, monitoring, and resource management. Rook ensures that Ceph functions smoothly on Kubernetes. Essentially, Rook can be described as "Ceph on Kubernetes".
Kafka
I have already written an article on Kafka, so I will not describe it again here. In a nutshell, Apache Kafka is an open-source distributed event streaming platform.
Strimzi
Strimzi allows us to run an Apache Kafka cluster on Kubernetes. It takes care of configuring everything for us, including the required Zookeeper node, security, and more. It also provides useful functions such as simplified access to resources, monitoring capabilities, and a bridge to expose the cluster through HTTP
Maas
We will be using MAAS to manage our infrastructure. I have already written an article about it. MAAS will handle the management of our infrastructure.
Let's sum up
Ok, let's do a quick summary and compare it with the 25 CHF / hour I earn working extra hours at the local bar.
| Category | Cost (CHF) |
|---|---|
| Hardware & MAAS | 0 |
| MAAS | 0 |
| Kubernetes & Microk8s | 0 |
| Ceph & Rock | 0 |
| Kafka & Strimzi | 0 |
| Ubuntu (OS) | 0 |
| Build Time (4h x 25) | 100 |
| Run Time (8h / year) | 200 |
| Lego Rack (delegated to my little brother) | 0 |
| Garage | 0 |
| Total | 300 |
Table 1 : Cost summary
300 CHF. Not bad for a 3 TB, 80 GB, 50 core cluster. I suggest comparing it with GKE using their online cost calculator
Figure 5 : Elon Musk
Enough talking, let's go to work !
I begin by deploying the node using MAAS. I then proceed to customize the storage setup by creating two LVM partitions - one for the operating system and another one that will be utilized by Ceph for our distributed storage.
Figure 6 : MAAS node storage configuration
With MAAS, it should take me less than 10 minutes to have the Ubuntu server nodes up and running. Once the installation is complete (don't forget to enable SSH access), I proceed to install Microk8s on the first node
nblotti@maas:~$ sudo snap install microk8s --classic
..
nblotti@maas:~$ microk8s enable  dns
..
nblotti@maas:~$ microk8s add-node
From the node you wish to join to this cluster, run the following:
microk8s join 10.0.0.1:25000/4a7211086a067b66e2c10e2fa6f34b5b/29120527fa89

Use the '--worker' flag to join a node as a worker not running the control plane, eg:
microk8s join 10.0.0.1:25000/4a7211086a067b66e2c10e2fa6f34b5b/29120527fa89 --worker

If the node you are adding is not reachable through the default interface you can use one of the following:
microk8s join 10.0.0.1:25000/4a7211086a067b66e2c10e2fa6f34b5b/29120527fa89
On the other nodes, after installing microk8s, I add them to the existing cluster by using the join command obtained from the first node
nblotti@maas:~$ sudo snap install microk8s --classic
...
nblotti@maas:~$ microk8s join 10.0.0.1:25000/4a7211086a067b66e2c10e2fa6f34b5b/29120527fa89
Now that all the nodes have been installed, I will verify if they have successfully joined the cluster.
nblotti@maas:~$ microk8s kubectl get nodes
NAME   STATUS   ROLES    AGE     VERSION
kvm5   Ready    <none>   3d13h   v1.26.0
kvm4   Ready    <none>   3d12h   v1.26.0
maas   Ready    <none>   3d12h   v1.26.0
nblotti@maas:~$
Great job! You now have a scalable (micro) Kubernetes cluster set up and ready to use in less than 30 minutes, thanks to MAAS, MicroK8s, and Ubuntu!
Now, let's proceed with deploying Rook on our cluster. Since we are using MicroK8s, we need to make some modifications to the Rook configuration:
nblotti@maas:~$  git clone --single-branch --branch v1.10.10 https://github.com/rook/rook.git
cd rook/deploy/examples

nblotti@maas:~$ cp rook/deploy/examples/operator.yaml rook/deploy/examples/microk8s-operator.yaml

nblotti@maas:~$ vi microk8s-operator.yaml
I uncommented the ROOK_CSI_KUBELET_DIR_PATH variable and modified the path
ROOK_CSI_KUBELET_DIR_PATH: "/var/snap/microk8s/common/var/lib/kubelet"
Let's create all the necessary prerequisites for the cluster and the cluster itself. I suggest that you edit the cluster.yaml file and customize it with the options that best suit your needs
nblotti@maas:~$ microk8s kubectl create -f crds.yaml -f common.yaml -f microk8s-operator.yaml


nblotti@maas:~$ kubectl create -f cluster.yaml
Once the installation is complete, you should be able to see this :
nblotti@maas:~/rook/deploy/examples$ microk8s kubectl get pods --namespace rook-ceph
NAME                                             READY   STATUS      RESTARTS   AGE
rook-ceph-operator-88885cd77-9fz6f               1/1     Running     0          3d13h
csi-rbdplugin-gzl5w                              2/2     Running     0          3d12h
csi-cephfsplugin-xppf5                           2/2     Running     0          3d12h
rook-ceph-mon-a-948d6f468-ftgjn                  2/2     Running     0          3d12h
csi-cephfsplugin-provisioner-68d67c47dd-mlntj    5/5     Running     0          3d12h
csi-rbdplugin-provisioner-7686b584f5-jvgfd       5/5     Running     0          3d12h
csi-cephfsplugin-cnqtb                           2/2     Running     0          3d12h
csi-rbdplugin-vgdcg                              2/2     Running     0          3d12h
csi-cephfsplugin-provisioner-68d67c47dd-xvjnn    5/5     Running     0          3d12h
csi-rbdplugin-provisioner-7686b584f5-29vrr       5/5     Running     0          3d12h
csi-rbdplugin-2lbwf                              2/2     Running     0          3d12h
csi-cephfsplugin-5qm7t                           2/2     Running     0          3d12h
rook-ceph-mon-b-6d8b86bfc9-jx8jr                 2/2     Running     0          3d12h
rook-ceph-mon-c-656749b49-86k4d                  2/2     Running     0          3d12h
rook-ceph-crashcollector-maas-9d5cf945f-c66k7    1/1     Running     0          3d12h
rook-ceph-crashcollector-kvm4-8579bc8969-dnt52   1/1     Running     0          3d12h
rook-ceph-crashcollector-kvm5-8fb499bfd-c9vq8    1/1     Running     0          3d12h
rook-ceph-osd-0-6c49789c99-x2mb7                 2/2     Running     0          3d12h
rook-ceph-osd-1-b77fdd9b6-mfg7l                  2/2     Running     0          3d12h
rook-ceph-tools-7c4b8bb9b5-kkrg2                 1/1     Running     0          3d1h
rook-ceph-mgr-a-69c8c94595-zxjgf                 3/3     Running     0          2d18h
rook-ceph-mgr-b-6dfcfccff4-htllx                 3/3     Running     0          2d18h
rook-ceph-osd-prepare-kvm5-rgrbc                 0/1     Completed   0          4h14m
rook-ceph-osd-prepare-kvm4-bn4g8                 0/1     Completed   0          4h14m
rook-ceph-osd-prepare-maas-q988h                 0/1     Completed   0          4h14m
The important components to monitor are the OSDs (Object Storage Daemons). There should be one OSD visible per disk/partition. If this is not the case, you should investigate the issue using the following command, replacing "kvm5-rgrbc" with your node name
nblotti@maas:~$ microk8s kubectl logs rook-ceph-osd-prepare-kvm5-rgrbc --namespace rook-cephEverything is now up and running. I still need to create a storage class. A storage class is used to notify Kubernetes that Ceph is ready to provide storage and specifies the main storage characteristics. Kubernetes will then match a request for storage (known as a PVC or persistent volume claim) to a storage class with all the necessary options. For more information on storage classes, please refer to this link
Let's first create storage class definition :
nblotti@maas:~$  vim storageclass.yaml
...

apiVersion: ceph.rook.io/v1
kind: CephBlockPool
metadata:
  name: replicapool
  namespace: rook-ceph
spec:
  failureDomain: host
  replicated:
    size: 2
---
apiVersion: storage.k8s.io/v1
kind: StorageClass
metadata:
   name: rook-ceph-block
# Change "rook-ceph" provisioner prefix to match the operator namespace if needed
provisioner: rook-ceph.rbd.csi.ceph.com
parameters:
    # clusterID is the namespace where the rook cluster is running
    clusterID: rook-ceph
    # Ceph pool into which the RBD image shall be created
    pool: replicapool

    # (optional) mapOptions is a comma-separated list of map options.
    # For krbd options refer
    # https://docs.ceph.com/docs/master/man/8/rbd/#kernel-rbd-krbd-options
    # For nbd options refer
    # https://docs.ceph.com/docs/master/man/8/rbd-nbd/#options
    # mapOptions: lock_on_read,queue_depth=1024

    # (optional) unmapOptions is a comma-separated list of unmap options.
    # For krbd options refer
    # https://docs.ceph.com/docs/master/man/8/rbd/#kernel-rbd-krbd-options
    # For nbd options refer
    # https://docs.ceph.com/docs/master/man/8/rbd-nbd/#options
    # unmapOptions: force

    # RBD image format. Defaults to "2".
    imageFormat: "2"

    # RBD image features
    # Available for imageFormat: "2". Older releases of CSI RBD
    # support only the `layering` feature. The Linux kernel (KRBD) supports the
    # full complement of features as of 5.4
    # `layering` alone corresponds to Ceph's bitfield value of "2" ;
    # `layering` + `fast-diff` + `object-map` + `deep-flatten` + `exclusive-lock` together
    # correspond to Ceph's OR'd bitfield value of "63". Here we use
    # a symbolic, comma-separated format:
    # For 5.4 or later kernels:
    #imageFeatures: layering,fast-diff,object-map,deep-flatten,exclusive-lock
    # For 5.3 or earlier kernels:
    imageFeatures: layering

    # The secrets contain Ceph admin credentials.
    csi.storage.k8s.io/provisioner-secret-name: rook-csi-rbd-provisioner
   csi.storage.k8s.io/provisioner-secret-namespace: rook-ceph
    csi.storage.k8s.io/controller-expand-secret-name: rook-csi-rbd-provisioner
    csi.storage.k8s.io/controller-expand-secret-namespace: rook-ceph
    csi.storage.k8s.io/node-stage-secret-name: rook-csi-rbd-node
    csi.storage.k8s.io/node-stage-secret-namespace: rook-ceph

    # Specify the filesystem type of the volume. If not specified, csi-provisioner
    # will set default as `ext4`. Note that `xfs` is not recommended due to potential deadlock
    # in hyperconverged settings where the volume is mounted on the same node as the osds.
    csi.storage.k8s.io/fstype: ext4

# Delete the rbd volume when a PVC is deleted
reclaimPolicy: Delete

# Optional, if you want to add dynamic resize for PVC.
# For now only ext3, ext4, xfs resize support provided, like in Kubernetes itself.
allowVolumeExpansion: true
I will create it and ensure that it is ready for use
nblotti@maas:~$  microk8s kubectl create -f storageclass.yaml

nblotti@maas:~$ microk8s kubectl get StorageClass
NAME              PROVISIONER                  RECLAIMPOLICY   VOLUMEBINDINGMODE   ALLOWVOLUMEEXPANSION   AGE
rook-ceph-block   rook-ceph.rbd.csi.ceph.com   Delete          Immediate           true                   2d19h
I'm almost finished. Now, I will create the Kafka cluster and begin working with the operator.
nblotti@maas:~$  microk8s kubectl create namespace kafka
..
nblotti@maas:~$  microk8s kubectl create -f 'https://strimzi.io/install/latest?namespace=kafka' -n kafka
Once the operator is running, I need to configure the cluster :
nblotti@maas:~$  wget https://strimzi.io/examples/latest/kafka/kafka-persistent-single.yaml
..
nblotti@maas:~$ vi persistent-single
The important sections to adapt are the listeners and the storage.
- First, to be able to access my cluster using NodePort, I add an external listener on port 9094.
- Second, I need to configure the storage for both applications (Kafka and ZooKeeper). Let's start with 100 GB
apiVersion: kafka.strimzi.io/v1beta2
kind: Kafka
metadata:
  name: my-cluster
spec:
  kafka:
    version: 3.3.2
    replicas: 3
    listeners:
      - name: plain
        port: 9092
        type: internal
        tls: false
      - name: tls
        port: 9093
        type: internal
        tls: true
      - name: external
        port: 9094
        type: nodeport
        tls: false
    config:
      offsets.topic.replication.factor: 3
      transaction.state.log.replication.factor: 3
      transaction.state.log.min.isr: 2
      default.replication.factor: 3
      min.insync.replicas: 2
      inter.broker.protocol.version: "3.3"
    storage:
        type: persistent-claim
        size: 100Gi
        class: rook-ceph-block
        deleteClaim: true
  zookeeper:
    replicas: 3
    storage:
      type: persistent-claim
      size: 100Gi
      class: rook-ceph-block
      deleteClaim: true
  entityOperator:
    topicOperator: {}
    userOperator: {}
Let's create my cluster and verify that everything is okay:
nblotti@maas:~$  microk8s kubectl apply -f  kafka-persistent.yaml
..

nblotti@maas:~$ microk8s kubectl get pod --namespace kafka
NAME                                          READY   STATUS    RESTARTS   AGE
strimzi-cluster-operator-65fb9b4686-rnm7z     1/1     Running   0          2d2h
my-cluster-zookeeper-1                        1/1     Running   0          2d
my-cluster-zookeeper-0                        1/1     Running   0          2d
my-cluster-zookeeper-2                        1/1     Running   0          2d
my-cluster-entity-operator-5c9844b78d-9s9kj   3/3     Running   0          2d
my-cluster-kafka-0                            1/1     Running   0          46h
my-cluster-kafka-2                            1/1     Running   0          46h
my-cluster-kafka-1                            1/1     Running   0          46h
Congratulations! All three distributed nodes are up and running. Now, let's verify that all storage class requests are bound:
nblotti@maas:~$ microk8s kubectl get pvc --all-namespaces
NAMESPACE   NAME                          STATUS   VOLUME                                     CAPACITY   ACCESS MODES   STORAGECLASS      AGE
kafka       data-my-cluster-zookeeper-1   Bound    pvc-14735fea-c5ea-4342-b1f2-fd54599632c6   100Gi      RWO            rook-ceph-block   2d
kafka       data-my-cluster-zookeeper-0   Bound    pvc-253b62f0-ed7d-484b-b972-048f021c5ae3   100Gi      RWO            rook-ceph-block   2d
kafka       data-my-cluster-zookeeper-2   Bound    pvc-0499969d-0b01-4f80-8ae8-e76b1b2a6f93   100Gi      RWO            rook-ceph-block   2d
kafka       data-my-cluster-kafka-0       Bound    pvc-f7b195a5-7c6d-451b-96cf-9a58e4497bc4   100Gi      RWO            rook-ceph-block   2d
kafka       data-my-cluster-kafka-1       Bound    pvc-11d4fff1-cf75-46f3-9298-f5503a454f36   100Gi      RWO            rook-ceph-block   2d
kafka       data-my-cluster-kafka-2       Bound    pvc-c114e4de-2568-4079-a96b-015287ddfb83   100Gi      RWO            rook-ceph-block   2d
Et voilà ! For those of you who are not tired, I have already explained here how to use Kafka, Kafka Connect, and Debezium to capture changes in our database and stream them to another database.
I think it's safe to say that it is much easier, from a technical standpoint, for young students to use their imagination to create great products. Thanks to open source, anyone has access to a world that even Larry Page and Sergey Brin wouldn't have dreamed of 25 years ago - at least when looking at the picture of their first production server. And I'm not just talking about companies with all their legacy systems to maintain.
I'm looking forward to seeing what the next big thing will be!